Fresco: An image download library made by Facebook

Downloading and displaying images is a very common feature of every Android app. It represents a big challenge for developers to work with bitmaps and the first thing you learn when you work in an Android application is that memory is a very limited resource, so you have to be extremely careful or you will encounter the infamous Out Of Memory Error.

Fortunately there is a number of third party libraries that turn out to be really helpful when it comes to downloading and processing images. Some of the most popular out there are Picasso, Glide and Universal Image Loader.

After a while of working with Picasso in an ongoing project I started to run into some trouble when it came to the memory management and bitmaps. That’s how I found a relatively new library created by the people at Facebook called Fresco.

Fresco is what the Facebook app uses to download and render images in Android, so I decided to give it a try and I was more than happy with the result.

To start using the library all you have to do is add the dependency to the build.gradle file of your project:

compile 'com.facebook.fresco:fresco:0.8.1+'

Fresco uses it’s own widget to display images called Drawee. The simplest way to start using it is by including a SimpleDraweeView inside your layout XML file:

<com.facebook.drawee.view.SimpleDraweeView
    android:id="@+id/my_image_view"
    android:layout_width="20dp"
    android:layout_height="20dp"
    fresco:actualImageScaleType="focusCrop"
    fresco:placeholderImage="@color/wait_color"
    fresco:placeholderImageScaleType="fitCenter"
    fresco:failureImage="@drawable/error"
    fresco:failureImageScaleType="centerInside"
  />

There are other attributes that can be used for a SimpleDraweeView, here is the list of all of them:


<com.facebook.drawee.view.SimpleDraweeView
    android:id="@+id/my_image_view"
    android:layout_width="20dp"
    android:layout_height="20dp"
    fresco:fadeDuration="300"
    fresco:actualImageScaleType="focusCrop"
    fresco:placeholderImage="@color/wait_color"
    fresco:placeholderImageScaleType="fitCenter"
    fresco:failureImage="@drawable/error"
    fresco:failureImageScaleType="centerInside"
    fresco:retryImage="@drawable/retrying"
    fresco:retryImageScaleType="centerCrop"
    fresco:progressBarImage="@drawable/progress_bar"
    fresco:progressBarImageScaleType="centerInside"
    fresco:progressBarAutoRotateInterval="1000"
    fresco:backgroundImage="@color/blue"
    fresco:overlayImage="@drawable/watermark"
    fresco:pressedStateOverlayImage="@color/red"
    fresco:roundAsCircle="false"
    fresco:roundedCornerRadius="1dp"
    fresco:roundTopLeft="true"
    fresco:roundTopRight="false"
    fresco:roundBottomLeft="false"
    fresco:roundBottomRight="true"
    fresco:roundWithOverlayColor="@color/corner_color"
    fresco:roundingBorderWidth="2dp"
    fresco:roundingBorderColor="@color/border_color"
  />

Don’t forget to add the XML namespace for Fresco.

xmlns:fresco="http://schemas.android.com/apk/res-auto"

As you can see, there are a lot of tasks that can be accomplished by setting the correct XML attributes.
One important thing to keep in mind is that Fresco requires you to set the SimpleDraweeView’s width and height to a specific value, either “match-parent” or a specific dp measure. If you set them to “wrap-content” it won’t work.

Now for the Java code:

SimpleDraweeView myImageView = (SimpleDraweeView) container.findViewById(R.id.my_image_view);

String imageUrl = "http://vignette4.wikia.nocookie.net/saintseiya/images/4/4b/The_Cast_of_Saint_Seiya_Omega.PNG/revision/latest?cb=20131229224909";

myImageView.setImageURI(Uri.parse(imageUrl));

That’s it, this is all the code you need in order to start working with Fresco inside your app. The library will take care of caching and resizing your bitmaps.

If you want to know more about this cool library, you can check the article published at the engineering site of Facebook.

Also check the documentation to see all the things you can accomplish with Freco.
Using Role-Based authentication in Umbraco 7

There are times when you require certain sections of your site to have restricted access.

When working with Umbraco, this task is very easy to implement using the Role-Based authentication. In this post I will show you a simple example of how to use this feature.

Creating a Member Group and adding Members to it

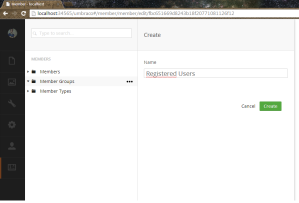
First, inside de back office, navigate to Members > Member Groups and create a new group.

Figure 1. Creating a new Member Group.

Figure 1. Creating a new Member Group.

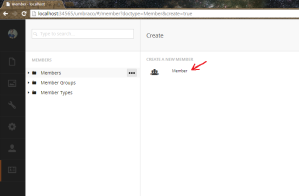
Next, create a new user under Members > Members.

Figure 2. Navigate to Members folder.

Figure 2. Navigate to Members folder.

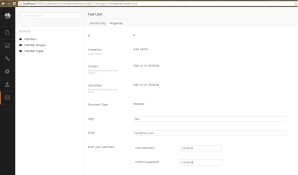
Enter a name for the new user and then, on the Properties tab, enter a login name and an e-mail address (these parameters are required). Umbraco assigns a new password automatically, you can also edit it.

Figure 3. Add the new user's information.

Figure 3. Add the new user’s information.

Also, it is necessary to assign the new user to a Member Group.

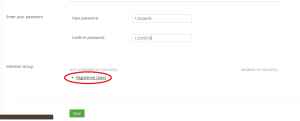
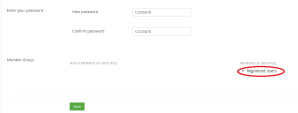
Scroll all the way down the properties tab, on the Member Group property, click on the group name you want the new user to be part of. The group name will then appear undet Member Group(s). After doing that, click Save.

Figure 4. Select a Member Group for the new user.

Figure 4. Select a Member Group for the new user.

Figure 5. User assigned to Member Group.

Figure 5. User assigned to a Member Group.

Adding Content to the site

The next step is to create new document types and templates for the sections in the site.

For this example, I created two document types with their corresponding templates. I also created a Partial View that displays a login form.

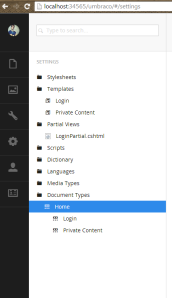
Figure 6. Create Document Types and their Templates.

Figure 6. Create Document Types and their Templates.

For the Login template I inserted a Partial View which displays a login page. The code for the Login template is as follows.

@using UmbracoTestProject.Models
@inherits Umbraco.Web.Mvc.UmbracoTemplatePage
@{
 Layout = null;
}

<h2>Login Page</h2>
<div id="loginForm">
 @{Html.RenderPartial("LoginPartial", new LoginModel());}
</div>

For the login form, the code is as follows.

@inherits Umbraco.Web.Mvc.UmbracoViewPage<UmbracoTestProject.Models.LoginModel>

@using (Html.BeginForm("Login", "Member", FormMethod.Post))
{
 <fieldset>
 <legend>Login</legend>

 @Html.ValidationSummary(false)

 @Html.LabelFor(m => m.Username)
 @Html.TextBoxFor(m => m.Username)
 <br />

 @Html.LabelFor(m => m.Password)
 @Html.PasswordFor(m => m.Password)
 <br />

 @Html.LabelFor(m => m.RememberMe)
 @Html.EditorFor(m => m.RememberMe)
 <br />

 <button>Login</button>
 </fieldset>
}

I created a model class for the user’s login information.

public class LoginModel
{
	[DisplayName("Username")]
	public string Username { get; set; }

	[DisplayName("Password")]
	[DataType(DataType.Password)]
	public string Password { get; set; }

	[DisplayName("Remember Me")]
	public bool RememberMe { get; set; }
}

Also, I added a SurfaceController that handles the login process.

public class MemberController : SurfaceController
{
	public ActionResult Login(LoginModel model)
	{
		try
		{
			if (Membership.ValidateUser(model.Username, model.Password))
			{
				FormsAuthentication.SetAuthCookie(model.Username, model.RememberMe);

				return Redirect("/private-content/");
			}
		}
		catch (Exception e)
		{
			ModelState.AddModelError("Login error", "Unable to login, please try again.");
		}

		return PartialView("LoginPartial", model);
	}
}

Finally, for the private page’s template, I added a simple line of code in order to test that the login was successful.

@inherits Umbraco.Web.Mvc.UmbracoTemplatePage
@{
    Layout = null;
}

<h2>Welcome @Members.GetCurrentMemberProfileModel().UserName</h2>

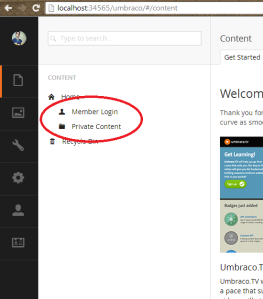
Now, add the new nodes to the Content of the site.

Figure 7. Add new nodes to the Content of the site.

Figure 7. Add new nodes to the Content of the site.

Protecting the restricted content

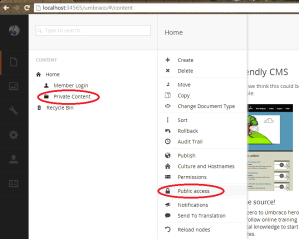
Click on the node that you want to protect and select Public Access.

Figure 8. Select the node you want to protect.

Figure 8. Select the node you want to protect.

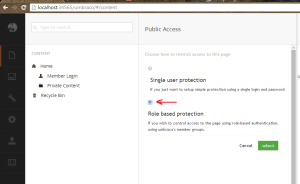
Choose the way you want to restrict access to the page. In this case, select Role based protection.

Figure 9. Choose how to restrict access.

Figure 9. Choose how to restrict access.

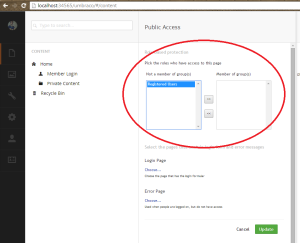
Now, it is necessary to select the roles that will have access to the page.

Figure 10. Select the roles that have access to the page.

Figure 10. Select the roles that have access to the page.

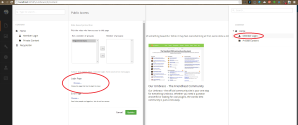
Select a login page.

Figure 11. Select the login page.

Figure 11. Select the login page.

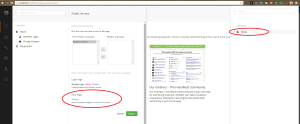
Select an error page to show when the user logged on but is not authorized to see the content. (For this example, I just chose the Home Page).

Figure 12. Select an error page.

Figure 12. Select an error page.

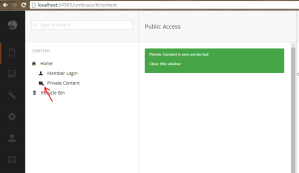
Finally, click update to save your changes, you will notice there’s a “Forbidden” sign at the bottom of the node’s icon.

Figure 13. Save your changes.

Figure 13. Save your changes.

Now, if the user hasn’t registered, they will be redirected to the Login page you selected.

How to upload and resize an image in ASP.NET MVC using ImageResizer

Recently I was developing an API and a CMS for a mobile application and I was asked to store different versions of an image and then display them depending on the device’s screen density.

Doing some googling I ran into this cool library called ImageResizer.

It is a library that offers a set of photography tools such as red-eye correction, image cropping, white balance correction and image resizing.

In this post I will show you how to upload an image and store different size versions of it using ASP.NET MVC and the Managed API of ImageResizer.

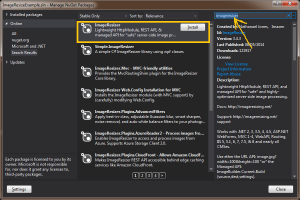
First, we are going to create a new ASP.NET Web Application and install the ImageResizer library via NuGet package manager.

Captura de pantalla 2014-07-23 11.50.16

Figure 1. Download ImageResizer library through NuGet package manager.

When the download is completed, it’s time to add some HTML to our view to create a file upload input and a submit button.

@using (Html.BeginForm("Upload", "Home", FormMethod.Post, new { enctype = "multipart/form-data" }))
 {
     <div class="form-group">;
         <label for="file" class="control-label">Select an Image</label>;
         <input type="file" name="file" id="file" class="form-control" />
         <br/>
         <input type="submit" value="Upload" class="btn btn-default" />
     </div>;
 }

Next, add a new Action to the controller that receives an HttpPostedFileBase object as a parameter. This action will be responsible for handling the resizing and storage of the image.

public ActionResult Upload(HttpPostedFileBase file)
{
	if (file != null)
	{
		//Declare a new dictionary to store the parameters for the image versions.
		var versions = new Dictionary<string, string>();

		var path = Server.MapPath("~/Images/");

		//Define the versions to generate
		versions.Add("_small", "maxwidth=600&maxheight=600&format=jpg";);
		versions.Add("_medium", "maxwidth=900&maxheight=900&format=jpg");
		versions.Add("_large", "maxwidth=1200&maxheight=1200&format=jpg");

		//Generate each version
		foreach (var suffix in versions.Keys)
		{
			file.InputStream.Seek(0, SeekOrigin.Begin);

			//Let the image builder add the correct extension based on the output file type
			ImageBuilder.Current.Build(
				new ImageJob(
					file.InputStream,
					path + file.FileName + suffix,
					new Instructions(versions[suffix]),
					false,
					true));
		}
	}

	return RedirectToAction("Index");
}

In order to resize the images, I used the Build()method of the ImageBuilder class. This method receives an ImageJob object that is initialized with five parameters:

  • A Stream object that contains our image file.
  • The destination path.
  • An Instructions object that contains the image processing parameters.
  • A boolean indicating if the source is disposed after being used.
  • A boolean indicating that the appropriate extension will be added to the destination path.

That’s it, now when you upload an image, you will notice that three versions are saved to the destination path that we specified.

If you need more information about the ImageResizer library you can check the documentation here.

I made this example based on the information presented at this page.

Setting up Umbraco with Visual Studio

Umbraco is a very powerful, very flexible, open-source CMS for .NET.It is a great tool when developing web sites and even services for things like mobile apps but, like with every new tool, it takes some time and effort to learn how to use it properly.

But believe me, once you overcome those scary hours of going through tutorials and documents, you will see how easy it is to work with this wonderful tool.

In this series, I will show you the basics of working with Umbraco, things I would have loved someone had told me on the first place.

This post is intended to serve as the starting point for other Umbraco posts I plan to write.

Creating a Visual Studio 2013 web application and setting up Umbraco

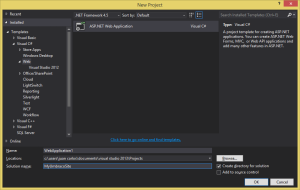
In order to start working with Umbraco, you need to create a new Web Application project.

Figure 1

Figure 1. Creating a new web application project.

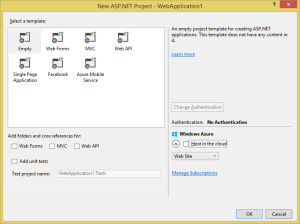
Select an empty ASP.NET application project from the dialog and press OK.

Figure 2

Figure 2. Select an empty ASP.NET application template.

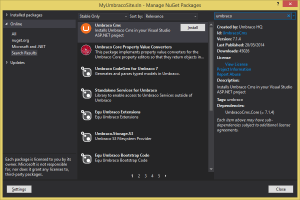
Now, in order to install Umbraco into your solution, open the NuGet package manager and search for “Umbraco”. Once the results appear, install the package called “Umbraco CMS”.

Figure 3

Figure 3. Installing Umbraco CMS from NuGet.

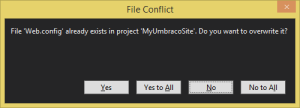
During the installation process, you will be asked if you want to overwrite the web.config file. This is because Umbraco adds several configuration values necessary for it to work. Select “No”,  Umbraco will overwrite your web.config file anyway, but it will create a backup in the App_Data folder. After the installation is finished you can merge your files and make sure they’re up to date.

Figure 4

Figure 4. Overwrite the web.config file.

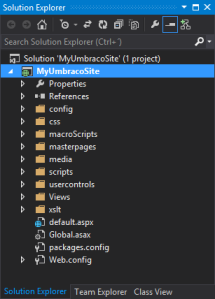
Once the installation is done, you will notice that several folders were added to the project.

Figure 5

Figure 5. Solution Explorer.

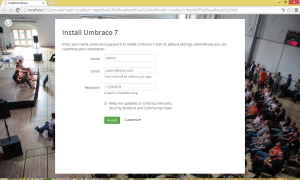
Now, you need to setup your Umbraco site. To do this, run the solution with the browser of your preference. You will see a configuration screen with some fields you need to fill. Once you’re done click “Install” and wait for Umbraco to run the necessary tasks.

Figure 6

Figure 6. Umbraco installation screen.

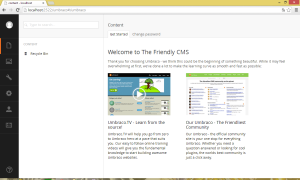
This is it! Now you have Umbraco up and running in your solution.

Figure 7

Figure 7. Umbraco’s admin page.

Note. The installation process I followed in this post created a local data base. You can find the .sdf file in the App_Data folder, it is called Umbraco.sdf.

If you need to set up Umbraco to work with an SQL Server database, you can do so by clicking “Customize” in the setup page you were presented when you first ran the application. You will need to provide the server and database information.